20130419

YFBS: Day 11 - All Good Things Come to an End

Today is my last day here at the Yamaguchi Frame Building School.  To read from the first day, go here.

With a bit of a heavy heart I came into the shop for the last time, but there was no time to be sad just yet.  Lots of little things still needed to be done to all of our frames, and this was the last day, so we all worked like there was no tomorrow.  Well, really, there isn't.

This was open when I came in this morning...and yep, I did get to use them!
First on the docket was finishing my braze-ons, of which only watter bottle bosses and the brake bridge remained.  First using bottle cages as placement templates, Mr. Yamaguchi showed me the best way to find a good spot for each cage.  Then with a specialized watter bottle boss jig and a drill bit suited for the job, drilling the holes began.  I managed to break a bit (oops) so Mr. Yamaguchi made a new one with a longer bit and a saw, which was pretty impressive.  The rest of the holes went smoothly, and brazing was as easy as heating up the boss and touching the silver brazing rod to it - the heat sucked the silver all around the boss and it was done.  Four bosses later, it was time for my brake bridge.

For all of your water bottle (or burrito, those fit well too) needs.
The bridge itself was already made, but needed to be cut to fit at the right place in my stays.  This process started with a hacksaw, then a careful miter of each side so that it would fit in my stays and keep the brake center.  Once it was there, it was time for my last brazing.  I brazed the bridge on with bronze, and it was the best brazing I've done yet - no burning, smooth, and shiny.  Just when I'm getting the hang of things...

Itty bitty brake bridge.
My frame went to the tank for the last time, then I moved onto the fork.  I needed to drill the brake hole and face the steer tube.  To set up the fork in the drill press, the blades need to be level with each other, and with the ground.  A small pilot hole is drilled through the whole way from the front of the fork, then a larger hole is drilled.  Flipping the fork over and setting the levels up the same way, Mr. Yamaguchi then used a special bit to drill a shallow indentation where the bolt would fit flush with the frame.  The rear hole also had to be 2mm wider, so an 8mm bit was used on just the rear hole.  

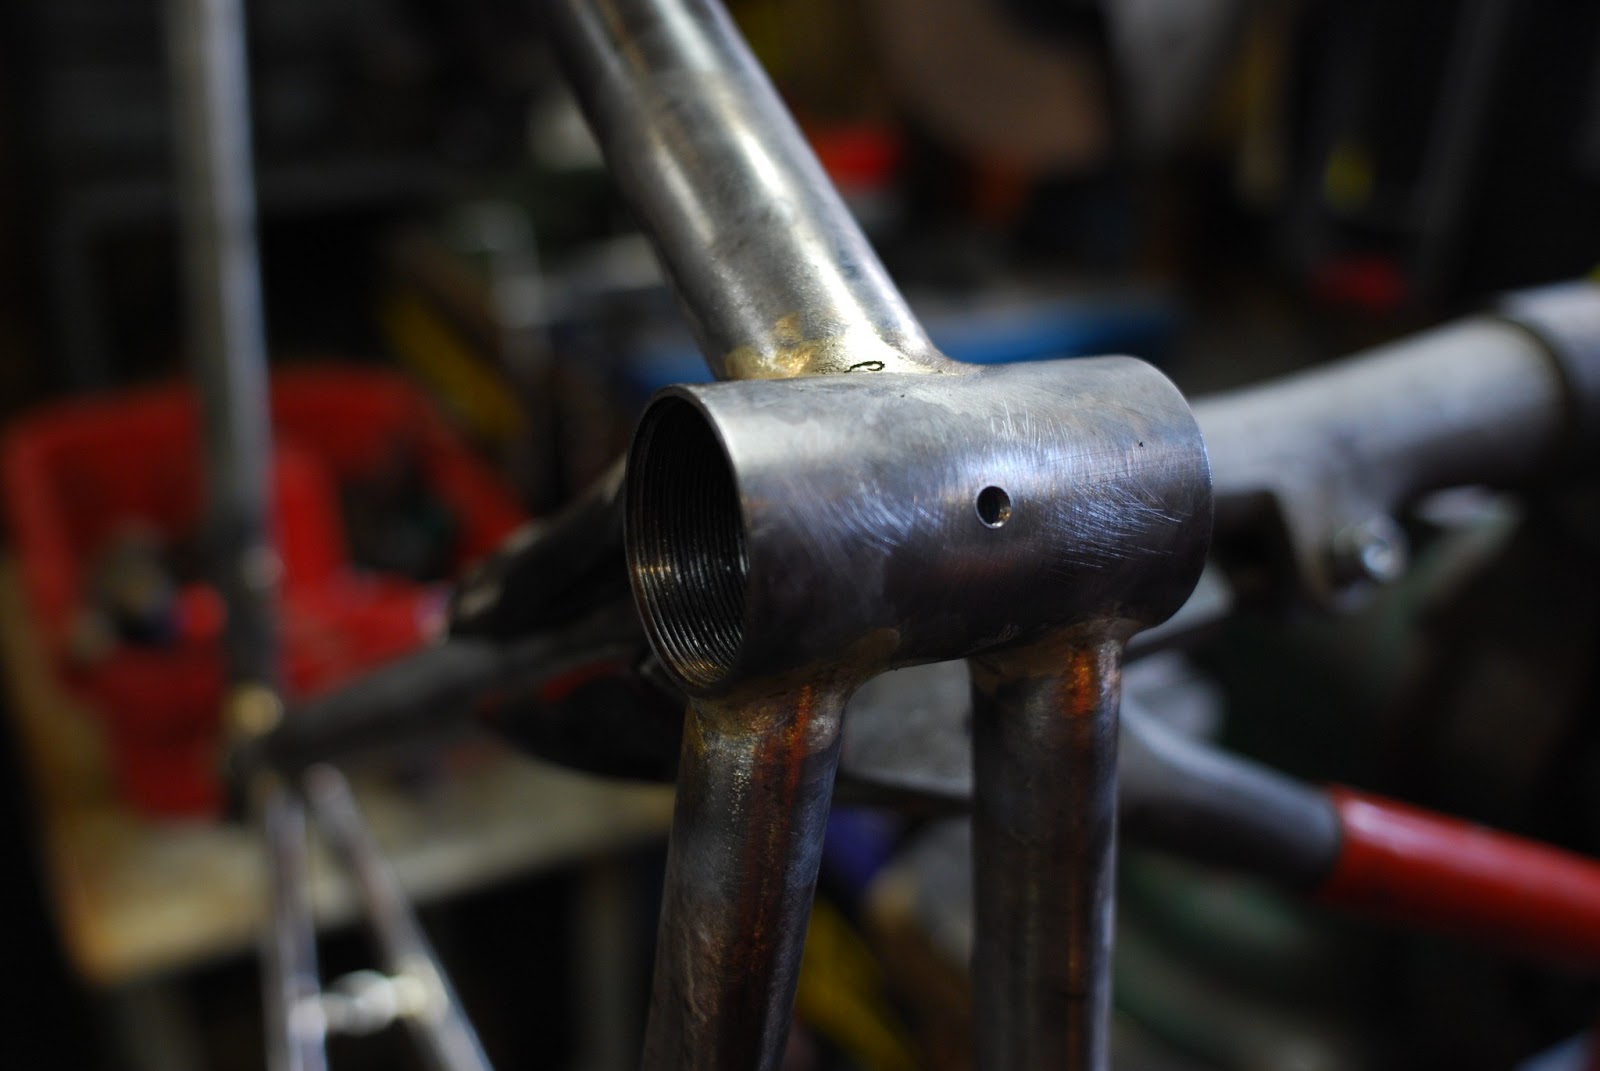
After drilling, Mr. Yamaguchi busted out the Campy tools, and after telling me how expensive and rare and delicate they are handed me the headset facing tool to use on the fork.  Only turning the facer clockwise, and adding tap oil every twenty or so revolutions, I slowly worked on my fork.  When it was done, Mr. Yamaguchi carefully removed the tool and inspected my work.  All was good!  The tool and fork needed to be cleaned with compressed air, and my fork was done.

I'm ready for my crown race.
Still waiting for my frame, I moved on to the stem.  I needed to cut notches in each side so that the clamps would work, so I busted out the hacksaw and cut away the center of the stem clamps.  I filed and sanded down the edges so that they wouldn't be razor sharp, and then did a bit more finishing work on my stem.

A stem and collection of junk tubes from the various cuts I've made all week.
My frame was now out of the tank and ready for the last little bits and pieces, but first was a final blast with the wire brush to clean all of the braze-ons and give the frame a nice, all-over shine.  I had to also cut my seat tube so that the clamp would work, so I used a special three blade hacksaw and then drilled a hole at the end of the notch.  Then it was time to face the headtube and bottom bracket, and ream the seat tube.  

It was both nerve wracking and exhilarating to use such an awesome toolset.  Rare, highly sought after, and incredibly expensive, they work amazingly well and really get the job done.  
I got to use the Campy heaset and bottom bracket tools, and it was very much the same process as the fork.  Not too fast, only clockwise (except the bottom bracket, of course), use tap oil, go slowly.  Facing actually went pretty quickly, and everything was cleaned with compressed air and checked for accuracy.  Reaming the seat tube was similar, but a little less daunting since we weren't using a Campy tool.  Facing was done!  

Shiny and ready to go!  Everything is coming together at this point, and it really feels like a real frame.
The last little thing was drilling a hole for the bottom bracket cable guide, and then tapping the threads so that the bolt would fit.  After everything I've done, this was easy enough.  Alignment was next.  To align the frame, first the frame goes on the alignment table and the seat tube is checked.  My seat tube was about 1mm too high, so Mr. Yamaguchi put his weight on it to push it down, or align it.  This was scary to watch, as I was nervous for my frame, but Mr. Yamaguchi assured me that increments of a few millimeters won't hurt the frame, and most production shops use hydraulic machines anyway (and things can be off to about 2mm!!).  The seat tube was fine, then the head tube was checked using a needle level to see if both sides were the same height.  I was .5mm lower on one end, so a rod was inserted in the head tube and twisted using the level end as the pivot.  Mr. Yamaguchi remarked that my frame felt really strong - a reassuring thing to hear!!  Next, the height of the seat tube in relation to the head tube was checked and fixed, then onto the dropouts.

This is for the cable guide attachment, which I'll put on after painting.  
First was making sure the dropouts were aligned with each other, which they were.  Next though, I had to check that they were the correct spacing, and also not offset in one direction or the other.  Using the seat tube as a base, the frame centering tool was moved in between the dropouts and then expanded until it touched.  The upper dropout was higher and the measurement was a little under 130mm, so both dropouts were adjusted until all was good.  The same process was used to check the fork alignment.  All was aligned, and according to Mr. Yamaguchi should be good for a year or two (though most likely more) and my frame was done!

The last little bit of time we had left was used to finish as much of the cleanup and finishing as possible.  Most students go home with a bit more sanding and filing to do, and we were no exception.  I was filing away and slowly getting my frame closer to perfection (well, for a first frame anyway), when Mr. Yamaguchi asked for a group shot with all of our frames.  

Upside-down frame.  Time was short today so I couldn't get many photos, but when I return I'll post everything that Mr. Yamaguchi gave to me on disk, which actually include action photos.
I used the letter stamps to press my name into the fork steer tube and the BB shell - a very faint "Psy" can be read on both.  We packed up our frames in bike boxes and said our goodbyes.  Mr. Yamaguchi gave us each a CD with photos from our class, and a diploma.  And with that, all of us had completed our frame building course here at the Yamaguchi Frame Building School.

Though my time here is over, my journey is far from complete.  The frame still has to be finished and built up, which I will be writing about here.  I will also post photos and an epilogue of sorts after I return to California.

In short, this was one of the best experiences of my life, and I will never forget my time here.  If the idea of making your own frame excites you in the least, you need to come here and experience this for yourself.  You won't regret it.

1 comment:

  1. Thanks for the link on reddit! Very thorough write up, felt like I was there. :)
    Want to take this course so badly, but I'm on the other side of the planet. Maybe one day...

    ReplyDelete

Tell me your bike related thoughts!

Template developed by Confluent Forms LLC; more resources at BlogXpertise