Showing posts with label components. Show all posts

20160826

Super Quick Update

And then this finally happened.
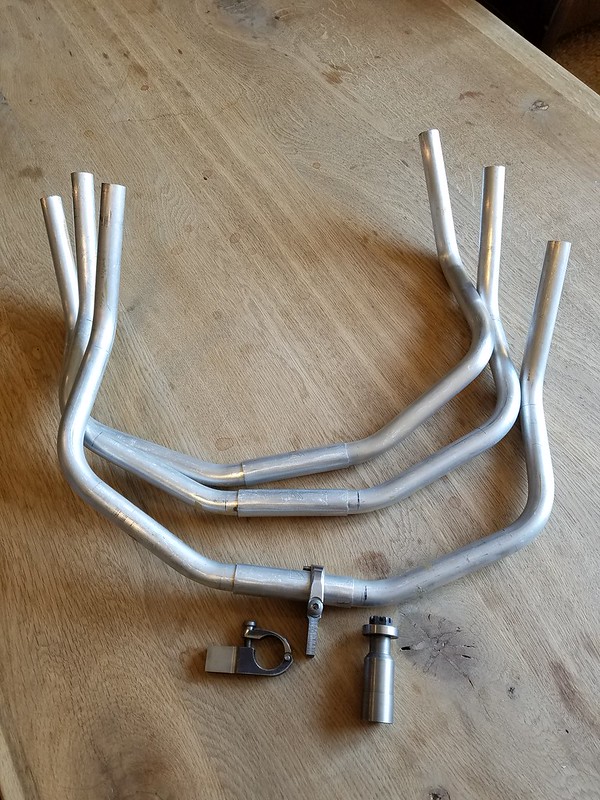
Petrichor Pursuit Bars
Whhhhhhaaaaaaat.
To answer a few questions - no, they are not for sale.  They are 25mm at the shim, so they will only fit with their proprietary clamps and won't work on other bikes, which is one of the reasons they are not for sale.  I am not sure yet what will be built with them, but I have enough to do three frames with aero head tubes (see that steer tube?  Yeah, that's a steer tube).  They are awesome, but I do not think I can get or order anymore like this.  Maybe. 

That's all for now.  I'm riding bikes a lot.  Track bikes and road bikes.  And building bikes.  Bikesbikesbikes.  

20150903

Takhion Bars in the house!

Courtesy of Old Vintage Steel!  He's got a couple of Takhion track frames right now, so go check them out.  

42cm and 44cm.
Since one of my Takhions was missing true Takhion bars, I can now swap out the 3TTT for one of these.  And I'll have an extra for projects like this one which is still very much in progress.   

It's amazing to me how these bars seem to be quite difficult to fabricate, unless I want to place an order of 10,000 or so.  Finding the proper alloy and being able to do these bends is apparently outside of the scope of many of smaller fabricators, so getting a batch made has led to mostly nowhere.  I'm still trying!

20150321

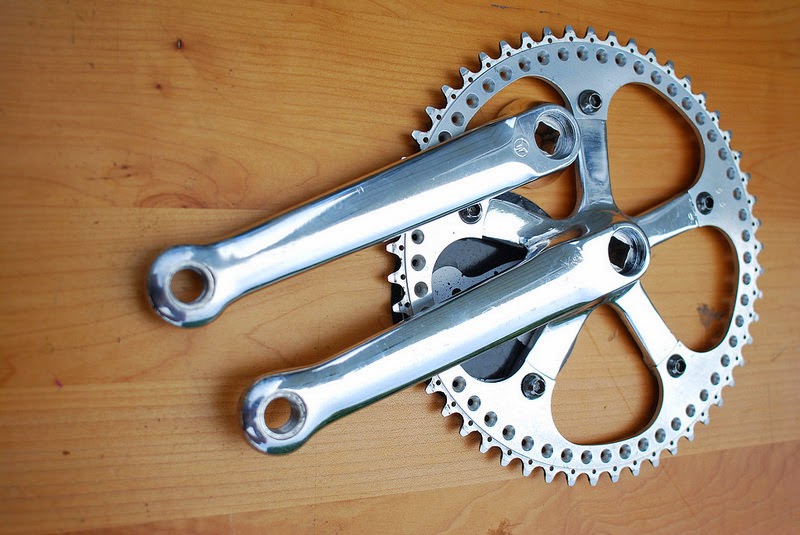
Takhion Crank, Take 2!

Not only was I crazy lucky enough to find a right Takhion crank arm, recently I also found this beauty pictured below.  

Chainring is NOT Takhion though...oh well!
This 172.5mm crankset is from 1991, and is in great shape aside from the fact that the Takhion logo on the right arm has been polished off, which I might be able to get fixed in the future.  How do I know it's still Takhion though?

This is how.
The year of production and length are stamped on the back of both arms.  Sadly 172.5 is a bit long for me when it comes to track riding, though it would be perfect for road.  If anyone has 165mm versions that they'd be willing to trade, send me an e-mail!

20150221

Takhion Crank!


It took me years to find one, and despite the fact that this one can only be used for display and is only the right arm, I'm really, really happy to have found it.  

After I polish this up a bit, it's going on the Aero.

20150126

Growth

The sun was pouring in, causing this blown out look.  I like it.
These wheels are beautiful enough to speak for themselves.  

20140326

Bringing Up The Rear

With the front following soon!

Not quite NOS, but close.
Another gorgeous part and a step closer to getting the Takhion fully built up.  I've been trying to search for components that are either NOS or in really good shape which is one of the reasons it's taken me so long to gather everything.  While not NOS, this particular derailleur has been thoroughly cleaned and polished, and is in great working condition.  

Recently I've been reading up on the recent NAHBS coverage and seeing all of the lovely frames that were featured at the show.  One of these years I'll get to go, but until then Prolly's coverage is probably some of the best out there.  

20140211

In Pursuit of Pursuits

For as rare as handlebar-attached-to-fork style bikes are, I often feel as if the specialized pursuit handlebars made for them are even rarer.  I've seen a few Takhion, Rossin, and Textima frames, but I'd guess for every three frames I've come across online or in person, I've only seen one pair of these bars.  

That silhouette.
At first glance they look like normal pursuit bars, but then you realize the angles don't quite match - instead of a drop there's a rise that gives a distinct silhouette to the beautiful bikes that adorned them.  

This set of 3TTT Moscow bars is in impeccable shape - not NOS, but perhaps only used in a race or two before being shelved somewhere.  My guess would be they were mounted on a Rossin pursuit frame like this one at some point in time, though the lack of marks on the clamp area makes me wonder if they were ever mounted at all.  

Москва!
Even more interesting is that 3TTT Moscow bars came in two styles - the typical pursuit and the rarer pursuit style pictured above.  3TTT's style is much more angular than the Takhion bars, and with a dark grey anodizing gives a bit of a harsher look to whatever bike it is mounted on.  

Better get those bar ends made...
It is a bit puzzling that in my experience the bars have been so much more rare than their respective bikes, and I have to wonder why.  Were these as custom as each of the bikes they were paired with, like the Takhion bars?  Were they difficult to produce for whatever reason?  Could they not be ordered in just any bike shop? 

Either way, they're a fascinating piece of cycling history, and another item on my list of what I'm always seeking! 

20140116

Just Superbe

I will always have a soft spot for SunTour.

Don't get me wrong - Campy is timelessly classic and dresses up only the finest of bikes, with many a steel bike made into a piece of art by the addition of one of its gruppos.  Shimano always seemed to be a tad bolder and slightly more modern, trying new things with it's 10 Pitch and AX series, with the ever reliable Dura Ace being standard on various racing machines.  But my very first road bike came equipped with SunTour Seven, and I've rooted for the underdog ever since.

Truthfully, I started really vying for them when I did my research and learned about SunTour Superbe and Superbe Pro - the engineering that went into them, the reliability, and the eventual decline of SunTour that many agree came from Superbe Pro being offered at too low of a price point for anyone to think it was good.  

Certainly the advances in technology have changed groups and gruppos for the better, and my SRAM Red equipped bike still blows my mind.  But of everything classic that I have ridden, Superbe Pro has always been my favorite.


NOS with a BB to match.
Superbe Pro to me feels like it belongs on a specific type of bike - it's seen a lot on NJS track bikes, bikes that are every bit as technical as they are classy.  It's seen on novelties like the Black Lightning and Yongjiu, or sometimes on the elusive Level frames.  I certainly don't feel like it belongs on just any frame - it has to have the exact combination of technical and classy for it to feel right to me.  

You can imagine my pure and utter joy when I learned it was compatible for use on the Takhion's drivetrain.  

So, yes, this restoration will have a (mostly) full SunTour Superbe Pro group, with the exception being the downtube levers, brake calipers, and brake levers.  The seatpost, bottom bracket, both derailleurs, crankset, cassette, and hubs will be Superbe Pro.  It's gonna be good.

I can't wait to get this one built up!

20131118

There's A New Belt In Town

As it turns out, it's not new news, but it's the first I've seen of Continental's dive into belt drives for bicycles.

Image via BikeRumor.
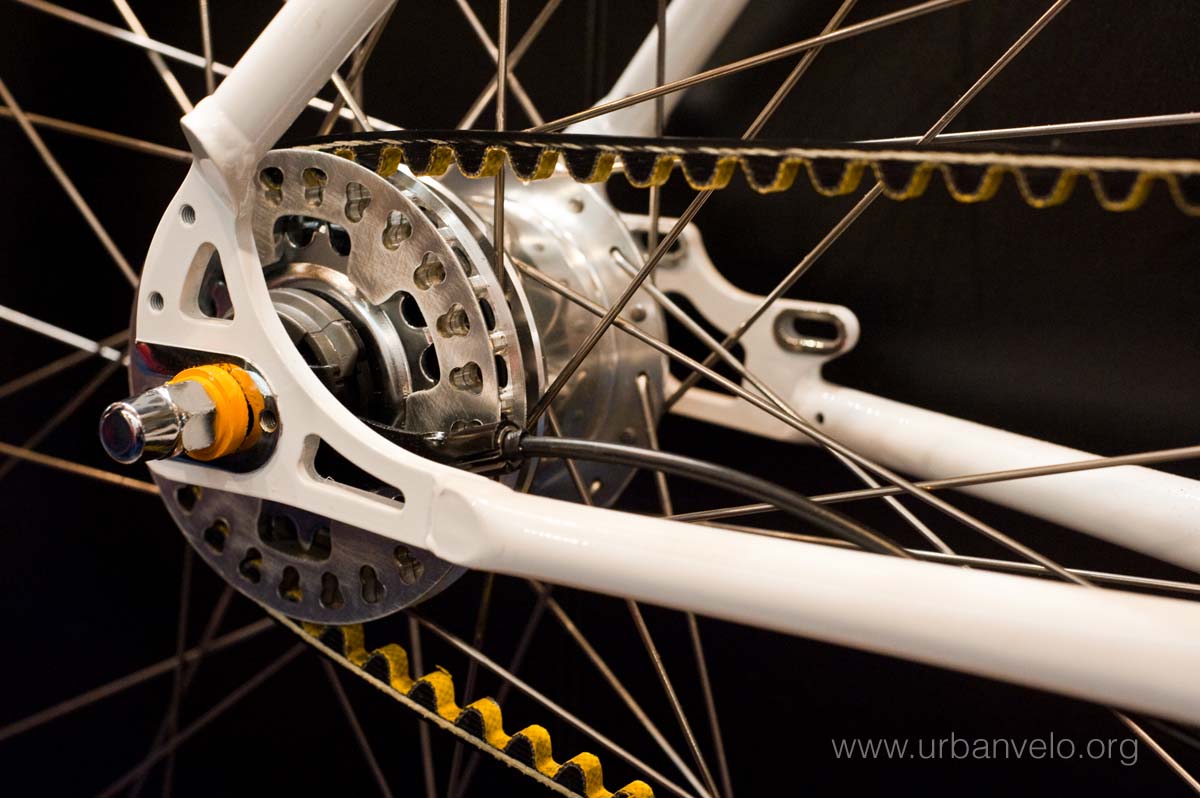
While it looks similar in design to Gates's belt system, Conti seems to be using a lip on the cogs and ring to hold the belt in place instead of a groove.  And though I haven't seen parts available yet for this system, Conti's site has specifics on tension and systems so I assume that something is in the works.  And lets not forget that Continental has been making belts for cars anyway, so bikes seem like the next logical step.

You all know I love belt drives and would be thrilled to see them available to a bigger market for a lower price point, so I'm all for this.  Though I would like to get my hands on one of these belts and compare it to the Gates system, personally.

Image via Urban Velo.
Maybe this means Phil Wood will start production of belt drive parts again.  No objections there.  

20131107

Even the beater needs upgrades sometimes

Timeshare beater bike got new tires a few days ago, because the ones that were on there were no match for the goatheads that plague my hometown.  

The Shipyard was the most necessary tool.
It may have been a minor upgrade, but it made a huge difference.  In my haste though, I grabbed 4000s' and not Gatorskins, but oh well.  I love these tires - I run them on my road bike, and they roll quite nicely, and while they're no Gatorskins they're still tough as nails.  Visually it's nice too; I liked the white, but I feel the black gives the bike an overall better aesthetic.  Maybe.  I'm still a bit torn.

As far as beater bikes go, I'm the worst when it comes to something like this.  It's in my blood to want to upgrade and constantly make things better than they need to be, which is why my timeshare ride still looks as pretty as it does.  Some people can abuse a bike until parts fall off, then they just replace them.  I lack the willpower to do this.  I should have just ridden this thing until the tires disintegrated into a sad little pile of dust, but crap like this keeps me up at night.  At least, it does with bikes - I wish I could be this careful about things like keeping my house clean or remembering to turn off the lights before leaving for two weeks.

Oh well.

It is a pretty bike. 

This is where it sleeps.
It was also my dad's birthday, and he got a slew of awesome bike gear that he's loving so far.  I'm pretty jealous of the tech compatible gloves, actually.

20131005

Recent Pursuit Bar Find

They're not Takhion bars, but they might be Textima.  Or maybe Rossin.  Rossin bars were only made by 3TTT, and don't match this design - looks like they are Textima.  Thanks Bicicrono!


There's a bit of surface rust and some gunk from the previous bar wrap, but they seem pretty solid.  There are no identifying marks or labels.


They're quite wide, coming in at 48cm.  They're also quite small in diameter - the clamp size on these bars comes in at approximately 22mm.  


Anyone have any clues on this one?  Anyone have a bike to match these :]?

20130820

The Pits

There's really not much to hate about riding in the bay area.  With it's cycling infrastructure, idyllic California weather, and terrain from track to mountain, it's just about perfect for anyone and any type of bike.  Almost.

San Francisco suffers from some of the worst bike theft in the country, and it's only gotten worse.  City dwellers know not to lock up their bikes for more than a few hours if they ever want to see them again (and certainly not overnight), but even with maximum security too many of my friends have had parts, saddles, wheels - and even entire bikes stolen.  Rarely do they get recovered.

SF is certainly != to all of the bay area, but with theft high in a nearby area it's always good to be prepared.  It's a well known fact that the best thing to do to deter theft is to make your bike the hardest target, usually by using multiple locks and being smart about how you lock up.  

But what about your headset?  Your brakes?  Even if your wheels aren't quick release, they can still be taken by anyone with a 15mm wrench - what then?  Often thieves will take a small part so that the bike is unusable, making the owner more likely to leave it for a while longer, then they'll come back to finish the job.  Even with the best locks, how do you combat this?  

Enter Pitlocks.  While certainly not 100% foolproof, with over a hundred different pits and an anti theft seizing mechanism, it most definitely makes your bike less of a target.  Pitlocks can be used for axles, brakes, saddles - you name it, and Pitlock probably has it.  

Tough, but shiny.
Looking like typical unassuming skewers, it isn't until you go to install these that you realize how genius they are.  Tapered ends don't allow for a tool to grip these easily, and the nut is protected on the locking side.  A special washer will also seize up if someone attempts to forcefully remove the skewer - the only way to effectively remove it is by having the pit or using destructive machinery.

The specially coded nut is surrounded by a protective end.
Each pit is coded so that you can order more parts or replacement pits if needed, and each pit is also designed so that not just any wrench could be used to pry it off.  For kicks I tried to get a few other bits and my Leatherman in there to see if I could get the nut off, but no luck whatsoever.  

Just prior to tightening.
After installing, the excess skewer can be marked and removed, leaving your bike with an extra layer of protection and a little less to worry about if you have to park in a sketchy area for a while.  

While having Pitlocks doesn't give you immunity from locking your bike up in a dark alley all night, it certainly does add a bit of deterrent and makes your bike less of an easy target.  They are a bit pricey, but worth the peace of mind, and will let you love the bay area again.

Except for wind.  You suck, wind.  
20130720

I know that sound. That's a bad sound.

Hopping on my bike to head home yesterday, there was an immediate "uh oh" feeling emanating from the bottom bracket.  After gingerly riding to the train station, I accessed the damage: crank was fine, belt was fine, pedals were dandy - but there was play in my bottom bracket axle.  It was hard to feel, but it was definitely there and definitely the source of the lovely song that my BB had been singing during my afternoon ride.

Once I was back in my shop, I was able to do a better test to determine it was the axle.  The BB is the only thing that remains stock on the Trek at this point, and since I don't know much about its history I can only imagine how many miles it has on it.  I also suspect my recent intermittent sprints during my commute probably didn't help, and a rather intense sprint that I did on my last stretch of road before pulling into work yesterday morning is probably what did it in.

I didn't have a spare BB to install, and every shop was closed at this point, so all I could do was angrily wrap my bars with some new Lizard Skin tape.


ARE YOU HAPPY NOW
After waking up, I located a new BB - 68mm shell, with a 113mm axle, to be precise, and set to work.  

Beautiful day today...if I can't ride outside, might as well work outside!
Replacing a bottom bracket is pretty easy once you know how to do it and have the proper tools.  I have a great story of being at the coalition and having to use the Sheldon Brown method with eight people to remove a cup, so I can see how it's a bit daunting to some.  This one turned out to be no problem.


Crankless!
I pulled the crank and checked the axle again - there was definitely play, so I knew I wasn't just going to be swapping the BB for nothing.


You served me well.
I pulled the old BB, a cartridge bearing plain looking thing, and cross checked it with the Shimano UN-55 I had picked up earlier.  Same measurements - good to go.

Brand new and ready for lots of mileage!
These two thankfully used the same tool for installation and removal, so I didn't have to buy another one.

One of the many types of Shimano BB tools.
Everything got cleaned and regreased, and installation was easy.

Fresh new axle!
Anyone wondering, the belt just kind of hangs out when I pull the crank.

Just hangin' out.
Once the crank is back on, I rechecked tension and chainline.  Since there was some play in the previous BB, I wanted to make sure my alignments were still correct, or that the new BB didn't throw off the chainline.

Pretty spot on!
The belt tension felt a bit high, so I adjusted it down a bit.  It's the same as tensioning a chain, just a slightly different dropout design on this particular District.

First these are loosened.
There are a few areas that can be tweaked to adjust tension.  The dropouts themselves have to be loose, and then the tension bolts are tightened or loosened.

These little guys.
After a few minutes and only getting my finger almost chopped off by the belt once (if it were a chain, I probably would be missing a thumb right now) everything was good to go.  I'll test later to ensure everything is playing nicely together, but right now I want a smoothie.

The whole process maybe took thirty minutes.  I think the most time consuming thing was cleaning the grease off my hands to take photos!

20130718

Geometry Wars

"Were you ever fitted to that bike?  I noticed your arms are quite a bit extended when you're on the brakes."

My coworker, a retired pro racer who can easily blow me out of the water on a rest day, was the first person to notice how much I look like Superman on my bike.  And with all of his experience and killer stories, he's not someone to ignore.  

We were waiting at the train station after work when he asked me about it.  I'd actually already ordered a much shorter stem to try to compensate, I just hadn't installed it yet.  The reality is, it's not that the bike didn't fit me - it's the fact that I'm fighting geometry.  

Before I went to the Yamaguchi Frame Building School I knew next to nothing about geometry.  Dutch bikes kept you upright, and track bikes threw you forward, while everything else floated in between - that was it.  I did find it a bit odd though that when I inherited the District and hopped on it, it felt nothing like my District Carbon.  On Trek's website, I remember looking at the geometry specs and noting that they were different, but I didn't quite know why.

After much learning (with still much more to learn) I know that my District Carbon was built with aggressive Madone geometry meant to give you a more forward, aero position.  It was built to put you in the drops, whereas Nine, the original District, was meant to be more of a relaxed, upright ride.  It's certainly no Dutch frame, but with 74 degrees and flat bars, this bike was not meant to be aggressive, and it's extended geometry was fighting with my pursuit bars.  While the frame was technically "my size," the top tube, combined with a long stem and forward reaching pursuits, was not.  This had been on my mind since I got back from Mr. Yamaguchi's class, but I had yet to truly address it until now.  

I am stubborn, and if something can be fixed I will figure out a way.  So I dropped the District's stem from a 110mm monster to 50mm teeny little thing, which brought the measurements from seatpost to brakes to the same values as my District Carbon.  While it's certainly hacky, I can get into a bit more aggressive position, my arms are nowhere near fully extended, I have better posture, and overall feel a lot better and a lot more in control.  Ideally a different frame more suited to my needs would be the best solution, but there are a limited amount of belt compatible frames right now that would work for me, and with all of my other projects right now, it's not my biggest priority.  Plus...I really like this bike.  

Having ridden almost 100 miles on my itsy bitsy new stem, I can say it's loads better.  And though it's not optimal, it's working well for me and my various jaunts around the bay.


Ah man, my stem cap is crooked.
From now on, I'm going to try to be much more aware of geometry on all of my bikes, and really try to be in tune with what fits me and what doesn't.  I'm definitely more in tune of what is aggressive (like Zakat!) and what isn't, and I'm getting a better feel of which components work with which bike, and why.   

This also highlights something that Mr. Yamaguchi taught us - you built the bike to the components, not the other way around.  The District was built for flats bars and a more relaxed ride, and its geometry certainly reflects that.  Doesn't mean I won't try to make it work for me!

20130606

I've got the 2001: A Space Odyssey monolith song in my head

There was a seriously amazing moment when I put these next to my frame and saw how they'd look together.  I may have screamed like a little girl.

They match my cheerful color scheme.
It's a bit too dark at the moment to take anymore decent shots, but I'm going to do a full inspection this weekend to make sure they're in perfect shape (the packaging was way less than ideal) and I'll grab some photos then.  The boxes certainly weren't damaged, but I want to check the spokes and ensure they're true.  

Hopefully this bike will be complete in time for me to take it to the Levi's GranFondo, or at least complete soon enough that I can register.  We'll see.

20130604

Things From This Week

Just a couple random tidbits and cool things for today.

After a momentary setback involving the scale being about one tenth of what it should be, it seems that Shapeways has successfully sent these guys for printing.  There was a lot of initial swearing when I got an e-mail saying my items were unprintable, but once I fixed the units and had the caps be more than 3mm wide, things were good to go.  Really excited to see how they turn out.  Even more excited that now the size is right I can get them in cool colors.

Strangely enough, I also received a letter from San Mateo County today, and was pretty psyched to find out they had sent me a $40 REI Gift Card as part of their commute.org incentive in which you pledged to take alternate transportation to work at least three days a week during April and May, and then you go online and fill out a survey telling them that you did.  I figured I would be entered in a drawing of some sort, but apparently everyone who did the survey got one (and were then all entered into a drawing for a free iPad or something).  How easy is that - ride to work, get money for REI stuff (or Clipper Card/some other commuter thing, I think).  

Today the unthinkable happened and my dream wheelset for my YFBS Bike showed up on Chainlove.  Meaning that now I have everything for that bike with the exception of the drivetrain, the pedals, and a few other small bits and pieces like tires and one more bottle cage.

Ridership on Caltrain is increasing quite a bit, and if you find yourself being a victim of getting bumped, please, please report it here!  Caltrain does look at these reports, and they tend to switch out cars (if they can) if cyclists are repeatedly getting left behind.  And if you don't have a tag already - for the love of whatever you feel is holy, tag your damn bike.  If you can't get a free tag from the conductor, make one.  At the very least, sit near your bike and tell other people where it's going.  And if you leave your untagged bike to be surrounded by bikes heading to a different destination and then you have to dig your bike out and inconvenience everyone, you really have no right to be angry.  

Photos of the headset on the YFBS bike coming this weekend!

20130531

Any Araya Experts Out There?

I'm usually pretty okay at tracking down info and history of parts, but this one's got me stumped.
Tell me your secrets.
It's an old Araya disc wheel that has come to live with me, and that's about all I know.  It also needs a new tire, and I believe it might be made of aluminum.  


Aluminum...honeycomb?
I do remember reading about aluminum disc wheels some time ago, but I can't find the article or any info.  It has a Dura Ace Skewer though, so that's nice.  


Other side.
Any one have any history on this wheel?  I'm not sure if I want to hold onto it or not, but I'd like to know at least a decent amount about it nonetheless.  

It's shaping up to be a lovely weekend.  Ride and enjoy it! 

20130503

Life is Like A Box of Bike Parts

On Monday before I dropped off my frame at the powder coater in hopes it would return to me safely, I sent out an e-mail to my fellow cycling geeks who work with me to see if anyone wanted to admire my (shoddy) handiwork before it was covered up.  The best part about this is taking a few minutes to geek out about bikes with my coworkers - we talked about parts, frame materials, brazing, and a little bit of everything else, which is always a nice mental break when things get a bit crazy at work.

One of my coworkers, however, delved into his glory days of riding and working on bikes, and told me all about how he used to ride and work on his bikes.  Then, surprisingly, he asked if I wanted any of his old stuff.  I was completely taken aback, and said I would buy whatever he was willing to part with, but he insisted on giving me just about all of it (though I did give him money for those lovely Campy tools and promised future bike repairs - it's the least I can do!!).  

The next day, a large box of goodies showed up at my desk.

It's like Christmas, but for people like me.
Going through everything was like travelling back in time.  Everything was vintage, though all in excellent condition - the tubular tires are still good, and the rims and wheel that was also included in the bunch are very well cared for.  

They're quite nice...dare I say they're Superb.
I was most excited about the various tools, since I'm working on bikes most days of the week and am always finding the need for extra tools.

Headset and bottom bracket tools!  Whee!
Yep, Campagnolo alright. 
Along with the tools, there were a few tubular tires and a well broken in saddle.  I don't know much about the saddle's origin, but it seems to have a decent amount of life left in it.

Ideale, Superbe - maybe they were on to something...
A chainring and freewheel, still in the box.  

There were a lot of Campy boxes and manuals in my goody box, but this was the most colorful and complete.
Next was a really nice looking Suntour Cyclone derailleur, along with the matching Superbe rear hub, the bearings on which are still impeccable.  A Campy C Record front hub was also among the bunch, as were the Campy levers.  The hoods are a bit distentigrate-y, but the levers themselves are great!  My coworker took great care of these parts.

Apologies for the ridiculous depth of field.  It's dark and I'm impatient.
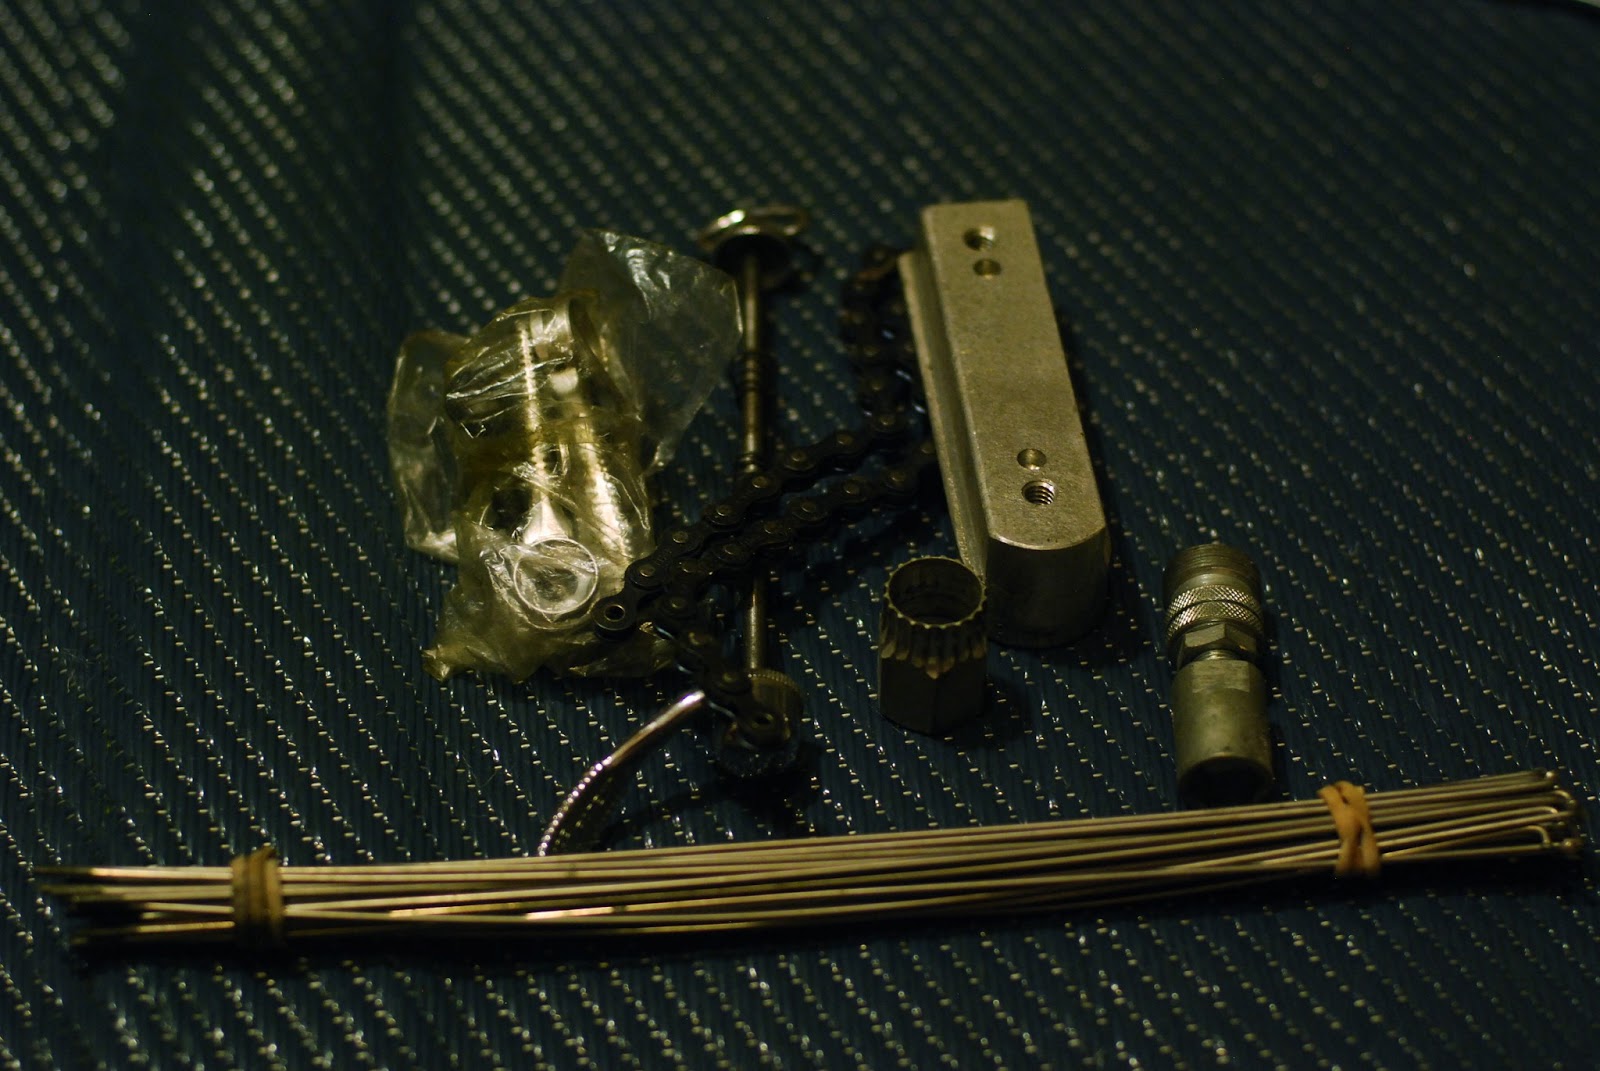
There were lots more tools, little parts, bearings, spokes, and more.  I found a chain breaker, crank puller, a few chain whips, skewers...it was magical.

The bag contains Campy downtube shifters.
I still need to finish going through the box.

Lots of these parts I will use, but anything that I can't will be donated to the Silicon Valley Bicycle Coalition.  

Most importantly, I always try to pay awesome acts of kindness like this forward.  Many thanks to my coworker - if you're reading this, you've no idea how happy you've made me!

It's Friday night.  Time to get greasy and work on bikes.  

20130501

A Brief History Lesson a la Suntour

I'm probably looking at your bike.  If you see me awkwardly staring in your direction with a glazed over look and my mouth hanging slightly open, it's because I'm analyzing the parts on your ride in my head.  Because of this social awkwardness (or awesomeness) I tend to notice little parts and bits on bikes that are more unusual than others.  I complemented a guy once on his twisted spoke lacing and he said I was the first person to notice it - I just thought it was cool.

So it was no surprise when I ran into a rather nice fellow commuter and noticed his brakes (or rather ran into him because of his brakes), which he was gracious enough to let me photograph.

Now that's interesting.
Having rarely seen this sort of brake and never before with a Suntour logo, I had to ask about it.  I learned that apparently a man named Charlie Cunningham of Marin had developed these types of brakes, known as roller cam brakes, and that Suntour had made them for a short while.  Roller cam brakes are interesting in their own right, and these especially caught my eye as they were nothing like what I was used to seeing from Suntour.

Apparently they did other parts too.

I didn't get a great look at the stem, but he said it was also a Cunningham/Suntour design.
This gentleman told me that people often offer him large sums of money for his bike, which has all original stock.  He says he's had it for years and just loves to ride it.  

I don't know if these really are rare, or if this is a well known fact, but I certainly knew nothing about it.  I love that I can learn something about bikes just about every day. 

20130130

The Crank Diaries

The process of converting my current commuter into a fixed gear has been a bit slow, but it certainly hasn't been non-existent.  Since the cog I need turns out to be really difficult to come by (read: out of stock everywhere always), I decided to start by tackling a problem that affects any type of bike I ride - crank length.
I love box.
Template developed by Confluent Forms LLC; more resources at BlogXpertise