20130729

It's Not The First Time

Necessity is the mother of invention.

With handlebars peeking out on the right.
I've carried more than one frame on my back, and I can say it's much, much easier when the fork is separate.  

More on this red beauty later.  First I've got some research to do.  

20130727

How Do I Convert My Single Speed Belt Drive to a Fixed Gear?

This is a question I get a lot.

Many companies make some great belt driven bikes, but I haven't found many that are sold exclusively as fixed gear belt driven bikes.  Belts are still relatively new in the bike market, so I can see the reason why companies want to sell something that appeals to as many people as possible and not just one niche, but lately I hear from more and more people that would like to run their bikes with either a fixed option or a flip flop hub.

Unfortunately, there's no kit you can go out and buy to do everything magically, though if you're lucky enough to have a good LBS you could probably drop it off there and have them do the entire conversion.  When I did the write up on the parts I swapped out on Nine, I included a lot of information and part sources, but it's by no means a step by step guide.

So, I decided to write a step by step guide.

I do have a few disclaimers though: 
- This is not a cheap or fast upgrade.  Be sure you're willing to put in the time and the money before you commit to anything.
- It might not work for all belt driven bikes.  Most likely if you have a single speed and follow the instructions, it *will* - but I haven't dealt with converting geared bikes, and certainly not all brands of bikes.
- If you are unsure how to do something, get help.  You need some bike knowledge to do this.  You don't need to be Sheldon Brown, but you do need to know your bike and how to dismantle it before diving into this.
- If you have any doubts, do research.  Think you know your chainline?  Double check.  Has someone converted your type of bike before?  To Google!
- I am not responsible if things go wrong.  I'm writing this because many people have asked me to, and there is not a comprehensive guide online to do so yet.  If you have questions, I'm more than happy to answer them - please make sure you know what you're doing!
- If you finish and are unsure if your bike is safe to ride, GET IT CHECKED.  

Additional note: I am writing this to convert to the CDX system, due to the lack of components for fixed gear CDC systems and the tension debate.  This is also a pretty quick and dirty step by step guide, and I assume that the reader knows enough about bikes that I can skip a play by play on how to remove a wheel, pull a crank, tension a belt, etc.  

Specs:

You will need to know:
- Chainline
- Original belt length (number of teeth)
- Dropout width
- What belt system you're running (CDC or CDX)
- Wheel size
- Bottom bracket axle width 
- Current belt ring and cog size
- Current BCD 
- Chainstay length

Tools:

You will need (and need to be able to/have friends to bribe to)
- Pull the crank*
- Remove the rear wheel
- Lace a wheel*
- Install a cog and lockring
- Replace the belt
- Tension the belt

*Depending on your current setup, this might not be necessary.

Components:

This is going to be dependent on your current belt system, current rear wheel, and what you would like to upgrade to.  If you are going for a full upgrade (like I did), here's what you'll need.

- New belt
- New belt ring and cog
- Rear wheel with the correct spacing

First, we're going to determine belt components.

1) Check which system you have.  If you are running a CDX system, you're lucky.  If you're running a CDC system, the entire drivetrain needs to be replaced.  The first thing you need to figure out is what you want your current gearing to be.  Currently, the only available option for a thread on fixed cog is 21T.  Most SS belt bikes I have encountered come with a 22T rear cog and a 50-55T belt ring.  If you're running the CDX system and are happy with your current gearing, I suggest keeping your belt ring and belt to save on cost.  If you're running a CDC system, you can either buy components for CDX in the same gearing you have now, or you can experiment a bit.  Keep in mind that changing the gearing more than one or two teeth will require a new belt, which can be calculated here at the bottom of the page. 

In total, you will need three parts for this section: a CDX belt ring, a CDX fixed gear thread on cog, and the appropriate CDX belt.  Once you determine what you need, you can get most things here.  Select the correct belt ring that matches your tooth count and BCD, and select the 21T threaded on fixed cog.  Belts can be found here too, or order these parts from your LBS if you can!!  Keep in mind you will need a lockring!

2) Once you know which belt components you need, assess your rear wheel.  My District used a rear wheel with road spacing (130mm) and a belt freewheel that fit on a Shimano hub body.  If your dropouts are standard 120mm fixed gear, then congrats!  All you need is a standard 120mm rear wheel with either one side threaded for a fixed cog or a flip/flop hub (more on that later).  If not, you have a few options here:

- Surly Fixxer: This one is tough, because the Fixxer is dead and compatibility is a huge issue.  If your wheel is compatible, this will save you the most money...however, if you can avoid it, I'd go with one of the alternate routes to avoid problems in the future.
- Special Order: Unfortunately I don't know of any pre-built fixed gear wheels that are spaced to 130mm or 135mm (or whatever your bike is), but your LBS or places like Wheelbuilder can make one for you.  
- DIY: If you know how to lace a wheel, you can do it yourself.  Surly has some amazing options for hubs and doing it yourself gives you complete control over what you want.  I laced a Velocity B43 rim to a Surly hub for my rear wheel, and it worked beautifully.  If you are lacing a wheel, be certain that the hub you're getting will match your current chainline.  If there is zero chance of this happening, you will have to change your bottom bracket axle to compensate.  

If your frame is steel and you're thinking of adjusting the dropouts to fit a better wheel size, only adjust to 5mm or less total!  Do NOT go from 130mm to 120 - that's too much stress on the frame, and eventually you're gonna have a bad time.  If you're going to do this , do it right!

3) The last component you might want to consider is the crank.  I always recommend shorter cranks on a fixed gear to avoid pedal strike and help with spinning, so if your cranks are longer than 170mm you can opt to go down to a shorter length.  This certainly isn't necessary and can always be done later, but if you can do everything in one pass it's kinda nice.  Keep in mind that belt rings are not made in 144BCD, so many track cranks won't work.  Also check the chainline specs of the crank you are upgrading to and make sure they match!!

Wait wait wait - how much is this going to cost me?
For the belt, cog, and belt ring, you're looking at about $250, give or take.  For the wheel: with the hub, rim, spokes and nipples it's around $175 - but that is entirely dependent on type of hub, rim, etc and doesn't include labor.  If you're throwing a new crank and the White Industries belt freewheel into the mix, that's another $375.  This is not a minor upgrade, so be absolutely sure you want to do this before proceeding!!  

4) At this point, lets say you have your components: your complete wheel, cog, belt, and belt ring.  It takes some time to install and align everything, so wait until you have a few hours free before you start throwing parts around.  The next few sections involve some basic tasks (changing a chainring, etc) which I'm not going to go into detail for since the internet has a ton of tutorials.

5) If you have a brand spanking new wheel, install the cog and lockring on it.  This is done just like any fixed gear cog, except you need to get a bit creative with the "chain whip."  I used a sheet of rubber to tighten my cog, though now you can get a belt drive chain whip!  Once the cog and lockring are on tight, the rear wheel is good to go.

6) If you're running a CDX system and aren't swapping your belt ring or belt, remove your rear wheel and move on to step 7!  

First, remove your rear wheel.  If you opted for the Fixxer approach and are keeping this wheel, now is the time to remove your belt freewheel, install your Fixxer, and then install your cog and lockring (see step 5).  

Next, you need to pull out the old belt by splitting the frame.  This is going to differ from frame to frame, but my Trek splits at the dropouts.  Some frames split near the seatstays, others near the dropouts - every bike is different.  Gently remove the belt without twisting or bending it, and set it aside.  Install the new belt - never bend, twist, or tweak the belt, since this can weaken it!  You can let it hang out while the belt ring is being switched out.  Now, swap the belt ring - you can pull the crank to do this if it's easier for you (or if you're swapping the crank at the same time).  Just like installing a chainring, follow all instructions for greasing and tightening the bolts and don't overtighten!  

7) Right now you should have the belt and belt ring you'll be using all installed and ready to go.  Gently wrap the belt around the belt ring, and then get your rear wheel ready.  This is going to go on your frame the same way you'd install it if you were running a chain.  Get the belt around the cog and then slide the wheel into the dropouts.  At this point you'll notice pretty quickly if this didn't work, but hopefully things look good!

8) Make sure to close your frame where the belt came out, and then start tightening, aligning, and tensioning your belt.  If your chainline seems way off, double check your current chainline with what you had written down originally - you might have to change the bottom bracket axle or use spacers in your hub to get everything working.  Tension is the same whether your frame uses dropout tensioners, an eccentric bottom bracket, or eccentric dropouts.  If you're unsure how to tension your belt...well, there's a first time for everything!

9) Once the belt is tensioned and aligned, make sure all bolts are tight and everything sounds okay.  The wheel should be straight and tensioned - I usually run my CDX belt at around 30-50 lbs.  If all looks and sounds good, take a test ride.

10) Now that you're running a fixed gear, make sure you've got proper foot retention and a front brake!  If your hub is a flip flop hub, keep that rear brake though - White Industries makes a thread on 22T freewheel!  Order it from your LBS or get it here.  

You can save the old belt parts, or sell them to offset the cost of the upgrade.  I kept my old set in case I come across a belt compatible frame and want to throw a single speed together.  

Troubleshooting/FAQ:

I followed all measurements, but my chainline is off!!
Sometimes components just don't play nice together, or measurements aren't exactly what they say they would be.  The best fix is to swap the bottom bracket axle, but first make sure your wheel is straight in the dropouts and is dished properly!  

I can't find a hub that fits my dropouts and keeps my chainline.
This happens with dropouts that are 135mm sometimes (when paired with road cranks).  Your best option is to change the bottom bracket axle to compensate.  
My new belt is too long/not long enough!
This is why I highly recommend sticking with your current gearing when ordering parts and ordering the identical components in CDX.  You can probably exchange your belt for something longer or shorter.  If you didn't change your belt and just swapped the cog or belt ring, then you dropped more than two teeth and didn't remeasure.  Use the belt calculator at the bottom of this page.

I can't get my frame apart.
Check that all the bolts are removed.  It's possible the frame is stuck together and needs a bit of muscle to be pulled apart.  

This is really expensive...is there a cheaper option?
Yeah, I know.  The only comparable option that I know of is the Base Urban FX 1.0, which isn't cheap but it does get you a whole bike that is similar in price to things like the Trek District, and is already set up fixed.  

What if I want to stick with my CDC system?
The Base Urbans seem to be using a CDC fixed cog, but I don't know where you can get one...unless you got your hands on a Phil Wood one waaay back when they were still making them.  If you can get the parts, go for it.  You have to be especially careful with chainline and tension on CDC systems though, and I highly don't recommend running a CDC fixed system without a front brake because the belts can slip under high tension if not maintained properly.

My belt makes a funny noise.
Your tension is too high or too low, or your chainline is off.  

Can I skid with a belt?
If you're maintaining your bike and regularly check your belt tension, then you will probably be okay.  I enjoy my knees so I avoid skidding and run a front brake, but with a well maintained CDX system you should be okay.  It seems that the consensus on this is that there is not yet enough data to know how well the belt will hold up to frequent skid stops, so I highly suggest running a front brake in case of emergency until there's more data on this subject!!

Will you do this for me? 
I guarantee a good LBS will be much more help to you than I will, though I'm happy to answer any questions by e-mail (aeyoQen<at>gmail<dot>com).  

If you follow through with this, you'll end up with a bombproof ride, a great conversation starter, and most of all a killer bike!  Best of luck, and I'd love to see before and after conversion photos.

20130725

Something About Pandas

If you've been coming here for a while, you've probably noticed the total lack of photos taken on/from/during the whole riding a bike process.  Up until recently, my only real camera options were either the varying degrees of cell phone cameras that I've had over the years or my trusty DSLR.  Cell phones are nice and all, but require multiple fingers to launch a camera app and to take the final photo, and while I love my DSLR attempting to pull that out of my bag, manually focus the lens, and take a photo while using both hands would most certainly end up with me on the side of the road tangled up in my bicycle with bits of broken lens mixed into my injuries.

A few weeks ago when I logged into my bank account to pay bills like a normal person, I noticed that after years of buying things like food my super special credit card points had amassed into an amount that could be traded for a little digital camera.  A Nikon Coolpix L28, to be precise.  Combined with a nifty little add-on from Chrome, I finally would have the ability to quickly take photos here and there while I ride, without having to get off the bike. 

I wanted to start slow to make sure I didn't kill myself (or anyone else) while trying this, so during a pretty empty stretch on my commute I tested the waters.

The cockpit!
Fortunately, I didn't die, and even better - neither did the camera, which seems to do a pretty good job of capturing quick shots here and there.  

Panda shots are shots that the rider takes of themselves while riding.  Since I hadn't died yet my odds were pretty good, and I decided to give that a try too.

I tried to smile, but I don't think it worked.
I definitely won't be pulling out the camera on every ride, but it is nice to have it there when I want to snap something quickly - especially in the case of an accident.  I can pull it out and take a photo in just a few seconds, though I'll work on actually getting more than just my helmet in the photo next time.  

Really wish I had this setup when I passed the legendary unicycle guy.

20130724

That chainring could eat children

I know that this has been on every bike blog today, but it's so freaking cool.  It's most definitely worth the watch if you haven't seen it yet.


Experiments in Speed from SpindleProductions on Vimeo.

I love the bars that he built - looks like Nitto Tsubasas!

20130722

Grey Monday Commute


Slight drizzle right now, and they're saying *maybe* thunderstorms!  I love gloomy summer days.  

20130721

Sunday Linkage

After testing out the new bottom bracket today, I have a new appreciation for bottom brackets in general.  It feels a million times better than the old one - much stiffer and more responsive.  

To share some of the cool bike related things I found this week...  

Trek is doing a fundraiser for the World Bicycle Relief where they'll match any amount that you donate. To make things even better, Fat Cyclist is having a contest where you get entered when you donate, and can win some awesome bike gear.  

If you're into trying out new gear for riding, check out Bike Loot.  For about ten bucks each month, you get a box full of goodies containing everything from "gels, bars, hydration, and maintenance."  Seems like a cool way to get exposed to a lot of products.

Bike Tinker is a great blog about, well, tinkering with bikes.  There are a lot of cool fixes and some really clever ideas to be found here.  

Combining two of my favorite things, Cupcake Ride is a blog dedicated to bicycles and cupcakes.  Lots of great photos about bicycle adventuring in Toronto, and of course organized rides that visit lots of cupcakeries.  

New Kit Day is making cycling kits right here in the Bay Area, and I dig the designs they have.  Also, much of the promotional material was shot at Hellyer!

And finally, Hipster Sled might be one of my new favorite terms.

That's all I got!


20130720

I know that sound. That's a bad sound.

Hopping on my bike to head home yesterday, there was an immediate "uh oh" feeling emanating from the bottom bracket.  After gingerly riding to the train station, I accessed the damage: crank was fine, belt was fine, pedals were dandy - but there was play in my bottom bracket axle.  It was hard to feel, but it was definitely there and definitely the source of the lovely song that my BB had been singing during my afternoon ride.

Once I was back in my shop, I was able to do a better test to determine it was the axle.  The BB is the only thing that remains stock on the Trek at this point, and since I don't know much about its history I can only imagine how many miles it has on it.  I also suspect my recent intermittent sprints during my commute probably didn't help, and a rather intense sprint that I did on my last stretch of road before pulling into work yesterday morning is probably what did it in.

I didn't have a spare BB to install, and every shop was closed at this point, so all I could do was angrily wrap my bars with some new Lizard Skin tape.


ARE YOU HAPPY NOW
After waking up, I located a new BB - 68mm shell, with a 113mm axle, to be precise, and set to work.  

Beautiful day today...if I can't ride outside, might as well work outside!
Replacing a bottom bracket is pretty easy once you know how to do it and have the proper tools.  I have a great story of being at the coalition and having to use the Sheldon Brown method with eight people to remove a cup, so I can see how it's a bit daunting to some.  This one turned out to be no problem.


Crankless!
I pulled the crank and checked the axle again - there was definitely play, so I knew I wasn't just going to be swapping the BB for nothing.


You served me well.
I pulled the old BB, a cartridge bearing plain looking thing, and cross checked it with the Shimano UN-55 I had picked up earlier.  Same measurements - good to go.

Brand new and ready for lots of mileage!
These two thankfully used the same tool for installation and removal, so I didn't have to buy another one.

One of the many types of Shimano BB tools.
Everything got cleaned and regreased, and installation was easy.

Fresh new axle!
Anyone wondering, the belt just kind of hangs out when I pull the crank.

Just hangin' out.
Once the crank is back on, I rechecked tension and chainline.  Since there was some play in the previous BB, I wanted to make sure my alignments were still correct, or that the new BB didn't throw off the chainline.

Pretty spot on!
The belt tension felt a bit high, so I adjusted it down a bit.  It's the same as tensioning a chain, just a slightly different dropout design on this particular District.

First these are loosened.
There are a few areas that can be tweaked to adjust tension.  The dropouts themselves have to be loose, and then the tension bolts are tightened or loosened.

These little guys.
After a few minutes and only getting my finger almost chopped off by the belt once (if it were a chain, I probably would be missing a thumb right now) everything was good to go.  I'll test later to ensure everything is playing nicely together, but right now I want a smoothie.

The whole process maybe took thirty minutes.  I think the most time consuming thing was cleaning the grease off my hands to take photos!

20130718

Geometry Wars

"Were you ever fitted to that bike?  I noticed your arms are quite a bit extended when you're on the brakes."

My coworker, a retired pro racer who can easily blow me out of the water on a rest day, was the first person to notice how much I look like Superman on my bike.  And with all of his experience and killer stories, he's not someone to ignore.  

We were waiting at the train station after work when he asked me about it.  I'd actually already ordered a much shorter stem to try to compensate, I just hadn't installed it yet.  The reality is, it's not that the bike didn't fit me - it's the fact that I'm fighting geometry.  

Before I went to the Yamaguchi Frame Building School I knew next to nothing about geometry.  Dutch bikes kept you upright, and track bikes threw you forward, while everything else floated in between - that was it.  I did find it a bit odd though that when I inherited the District and hopped on it, it felt nothing like my District Carbon.  On Trek's website, I remember looking at the geometry specs and noting that they were different, but I didn't quite know why.

After much learning (with still much more to learn) I know that my District Carbon was built with aggressive Madone geometry meant to give you a more forward, aero position.  It was built to put you in the drops, whereas Nine, the original District, was meant to be more of a relaxed, upright ride.  It's certainly no Dutch frame, but with 74 degrees and flat bars, this bike was not meant to be aggressive, and it's extended geometry was fighting with my pursuit bars.  While the frame was technically "my size," the top tube, combined with a long stem and forward reaching pursuits, was not.  This had been on my mind since I got back from Mr. Yamaguchi's class, but I had yet to truly address it until now.  

I am stubborn, and if something can be fixed I will figure out a way.  So I dropped the District's stem from a 110mm monster to 50mm teeny little thing, which brought the measurements from seatpost to brakes to the same values as my District Carbon.  While it's certainly hacky, I can get into a bit more aggressive position, my arms are nowhere near fully extended, I have better posture, and overall feel a lot better and a lot more in control.  Ideally a different frame more suited to my needs would be the best solution, but there are a limited amount of belt compatible frames right now that would work for me, and with all of my other projects right now, it's not my biggest priority.  Plus...I really like this bike.  

Having ridden almost 100 miles on my itsy bitsy new stem, I can say it's loads better.  And though it's not optimal, it's working well for me and my various jaunts around the bay.


Ah man, my stem cap is crooked.
From now on, I'm going to try to be much more aware of geometry on all of my bikes, and really try to be in tune with what fits me and what doesn't.  I'm definitely more in tune of what is aggressive (like Zakat!) and what isn't, and I'm getting a better feel of which components work with which bike, and why.   

This also highlights something that Mr. Yamaguchi taught us - you built the bike to the components, not the other way around.  The District was built for flats bars and a more relaxed ride, and its geometry certainly reflects that.  Doesn't mean I won't try to make it work for me!

20130716

And That's Why You Always Check Yer Bolts

This morning I received a picture from a friend.

Impressive.
As he was pulling into work, he heard one bolt go, then the other four almost immediately after.  Fortunately this happened in a parking lot and not during a stretch of road where the bike lane runs through a freeway off-ramp, so he's fine, but...yikes.

Every day I do a quick ABC check, giving the air, brakes, and chain (or in my case, usually a belt) a good once over before I ride off into the sunrise.  Incidents like these are a good reminder that if you ride frequently you should check all bolts at least once a week - handlebars, chainring, crank, even the bolts that attach your cleats to your shoes.  Fortunately my friend wasn't hurt, but you could end up damaging yourself and your bike if these things aren't tightened properly.

I should add that tightened doesn't mean as-tight-as-I-can-possibly-torque-it-and-then-some, it means following the instructions and using a torque wrench (or knowing from years of experience how tight something should be.)  Overtightening is just as bad as undertightening.  

Now, if you'll excuse me, I'm going to check my chainring bolts for the third time today.  

20130714

It Really Doesn't Take Much

My cell phone has being dying a slow and sad death over the past few weeks, so today when the charger ripped in half and the volume completely went kaput I rode down to get a new one. 

Naturally the first thing I had to do was play with the camera.  


So far so good!

My little jaunt through San Mateo also led me to discover a few new things, such as a better way to get to Trader Joes and another bike shop.  I also had to jump on El Camino for a little bit, which seems to have become almost as bad as PCH in terms of riding.  There are a lot of parallel bike routes, but it would be awesome to see some more signs (or even infrastructure) on El Camino since it's such a direct route.  

Nine also got a decent cleaning and tuning, since it was making some gnarly noises over the past few days.  I thought it was the bottom bracket, but when I removed the belt and checked the spindle and bearings everything was fine.  After cleaning and regreasing things are silent and smooth again, so I'll just chalk it up to Phil Wood grease saving the day again.  

Hope everyone had a good weekend!

20130711

Hindsight is 20/20

Some days if I'm in the right mood I'll bike the entire way home after work.  It doesn't happen often because I work long hours, usually end the day hungry enough to eat my bike, and the route that time of day is The Windtunnel From Hell, but every once in a while I decide to do so.  

This was not one of those days.

That's two trains.  One trying to push the other.
One of Caltrain's amazingly efficient fleet breaks down at least once a month or so, and this particular day I arrived at the station after work to find one train trying to push the other off the tracks because I guess it just decided it didn't want to go anymore.  

The train that was pushing, by the way, was also blocking a main road.

Train, as far as the eye can see.
Since one side was blocked, trains were singletracking alternately, meaning everything was delayed and that the bike car was a cluster of madness.

The name of the savior-train was Operation Lifesaver.
Somewhere during the climbing over bikes in the bike car and a man glaring at me looking like he was about to eat me because I accidentally bumped him with my wheel due to there being no other place for me to go, I realized that I should have followed my gut and ridden home that day.  

Also, I got home about an hour after I would of had I ridden.  Lesson learned!

This happened a few weeks ago, but there's always exciting Caltrain news.  Like the man stealing bikes at the Hillsdale station yesterday.  If you ride public transit, stay close to your bike, or a Sharks Jersey clad maniac might hop on during a stop and nab it.  

20130709

KVANT? on eBay!!

The listing has ended, and photos removed since the links are dead, but if you want to see what this frame became, check it out!

A friend of mine is selling this awesome retro find - it's *maybe* a Kvant frame, similar in design to a Takhion.  I don't know much about the history, but I'm bummed that I won't be able to get this one.  Check it out!

One of my Takhions came from the seller.  He's a good guy and really easy to do business with!

20130708

Takhion Bar Plugs: To The Rescue!

Continuing on with The Wonderful Adventures of 3D Printing Bike Parts, there have been some update since the last post.

The headset caps are pretty much good to go, and I'm currently in the process of getting the mold ready for PVC injection.  So that's neat.

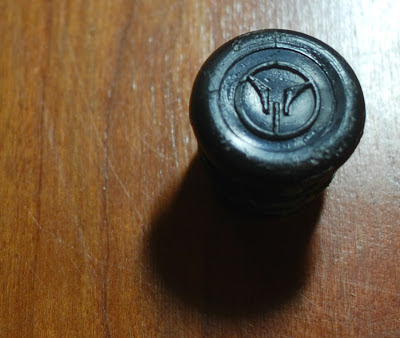
The bar plugs, however, are a different story.  Thankfully, I had help from some awesome people who saved me from doing everything completely wrong by providing me with schematics and an orphan bar cap for reference.

Looks like I have some work to do. 
It's pretty obvious I need to revisit this design and rework it.  I was going off of a spare plug I had lying around, which just doesn't cut it.  

Well, oops.
Revisions will be done this weekend and submitted for a second prototype batch.  In the meantime, if you're waiting on a headset cap, hang tight - they're coming soon!

Poor orphaned bar cap.
I'm still blown away by the kindness of the internet cycling community.  I never would have thought I'd receive so much support and help with this.  You guys rock.  

In completely unrelated news, I was featured in an article regarding my commute in one of the world's major tech hubs.  Check it out if you're interested!

20130706

Outside Doesn't Suck So Much Right Now

The temperature dropped from about 113 to 83, which actually felt refreshing after the past few days of feeling like I was being smothered by a giant hairdryer.  As such, my dad and I decided to hit the local trails for a bit this morning.

It wasn't until I left my hometown after high school that I realized how bike friendly it was, and for a long time there was a killer biking blog that turned out to be based here.  Infrastructure, signage, trails, bike racks - there's enough here that it was award a bronze level award by The League of American Bicyclsts.

There's one trail that we always seem to gravitate towards - with multiple entrances and side trails that make it possible to traverse the entire town, plus little areas to stop along the way, it's the perfect ride. 

Blackberry bushes!
A nice little snack.  Not too many were ripe, but the few that were tasted quite delicious.
My dad, my riding partner.  Don't let the bike fool you, he's fast on that thing. 
I love this lacing pattern.
"Why does it only have one speed?"
At the local high school.  The remaining Fourth of July decorations are the epitome of summer here for me.  
We made it back before it got too hot, but it was still warm enough to get the quintessential summer feel of riding in my hometown.  

20130705

Happy (Belated) Blow Up Things Day

I attempted to combine sparklers and bicycles with some long exposure photography, but that didn't work out quite so well.

I won't quit my day job.
Just pretend there's a seat tube.  And saddle.
Hope everyone kept all of their body parts and hair intact!

20130702

My Tires Are Melting

Generally any temperature above eighty degrees renders me completely useless.

DO NOT WANT
Nonetheless, I can never go more than a few days without riding or tinkering with something, and since the heat was keeping me off the bike I tackled a headset problem that timeshare bike was having.

I do wonder what color that saddle was originally.
For those of you not familiar with Zakat, my timeshare bike, understand that the frame is of unknown origin and uses standards that no other place in the world seems to use, specifically the headset.  Its fork was borked beyond repair when I got it, which required me to replace it, and when I tried to replace the headset I discovered that nope, nothing else fits it.  Literally nothing.  Believe me, I tried.  So I ended up fudging together a headset out of a few other headsets (I've been informed that I am going to hell for this, I know) which is not something I recommend.  Seeing as this was a beater put together with spare parts to ride around my ultra hot hometown and I'm not racing anything with it, I opted to take my chances.  So far I haven't died.

Anyway, the headset was rattling, and the cure was another spacer.  Once the night cooled off to a refreshing 100 degrees at 10 PM (kill me) I hunkered down in the garage to add the spacer.

Boom.  Easy.
About a minute later I was done and also drenched in eight gallons of sweat.  A bit of tweaking and the rattle had stopped, everything was fixed, and I was good to go.  

I love these handlebars.
Since I had everything out I did a few more tweaks here and there and checked everything with the intention of going on a night ride, but it was still too hot to even breathe.  I've ridden through storms, wind, pit bulls and Los Angeles, so it takes a lot for me to not ride...this is just too much.  

Here's to hoping the weather stops being stupid relatively soon.
Template developed by Confluent Forms LLC; more resources at BlogXpertise